Manuals and Instructions
Click HERE to download a PDF manual for the Corn Kernel Cutter.
The Corn Kernel Cutter
--
Instructions for Use
--
Maintenance Tip
If your compressed air supply does not include an inline oiler, place a couple of drops of light oil (air tool oil or 3 in 1 oil) in the coupler nipple prior to use.
In The Box
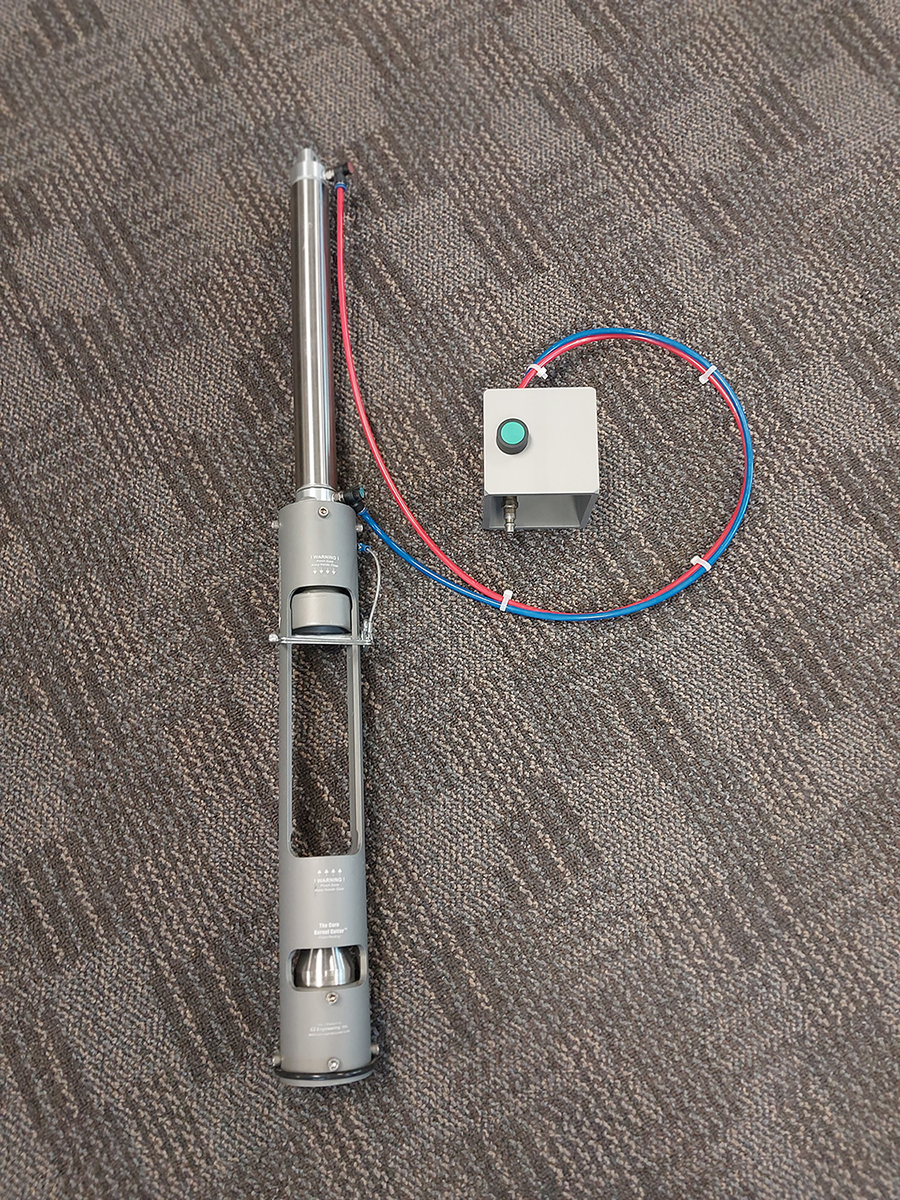
The Corn Kernel Cutter comes fully assembled and ready for use. There will be three elements, plus any extra Annular Knives or Ring Mold Pans.
|
1) Cylinder Assembly with the control Box attached.
|
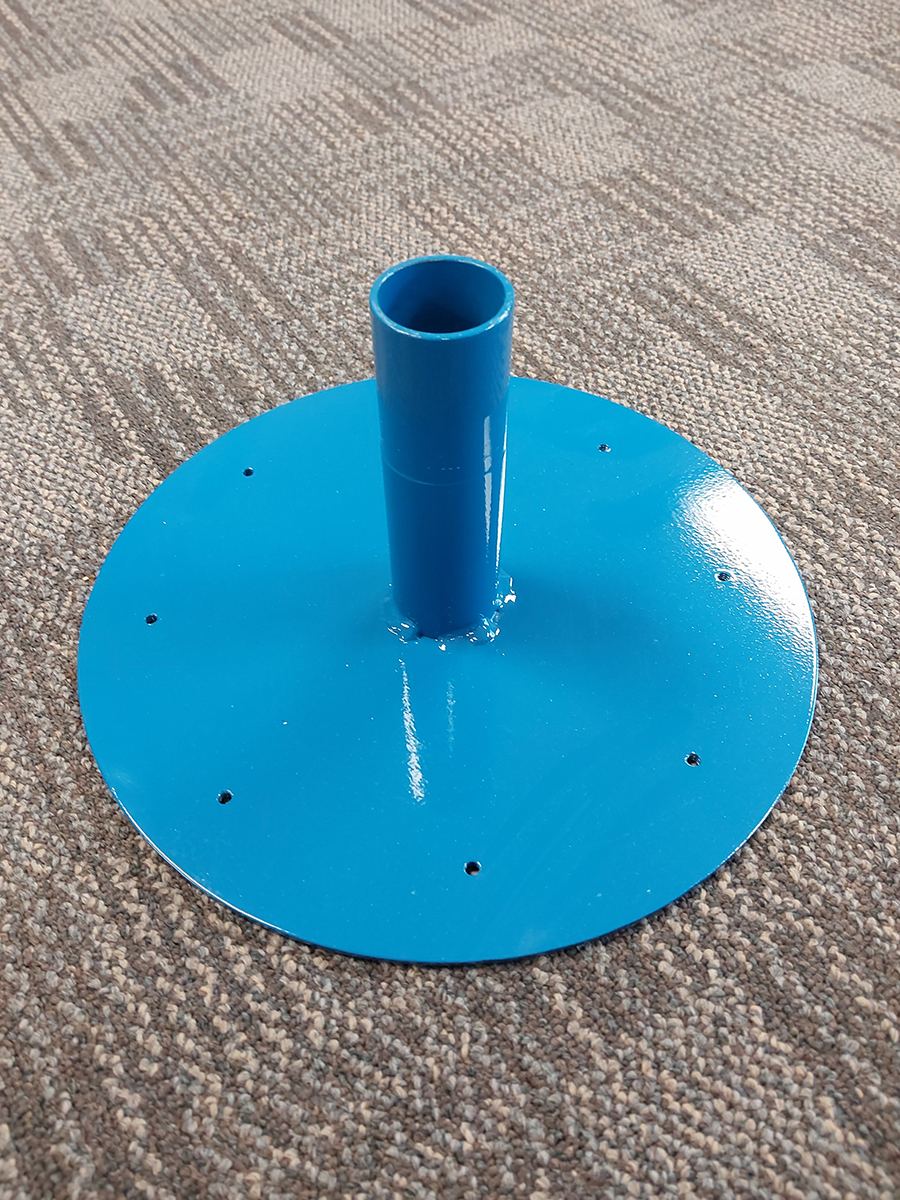
2) Base
|
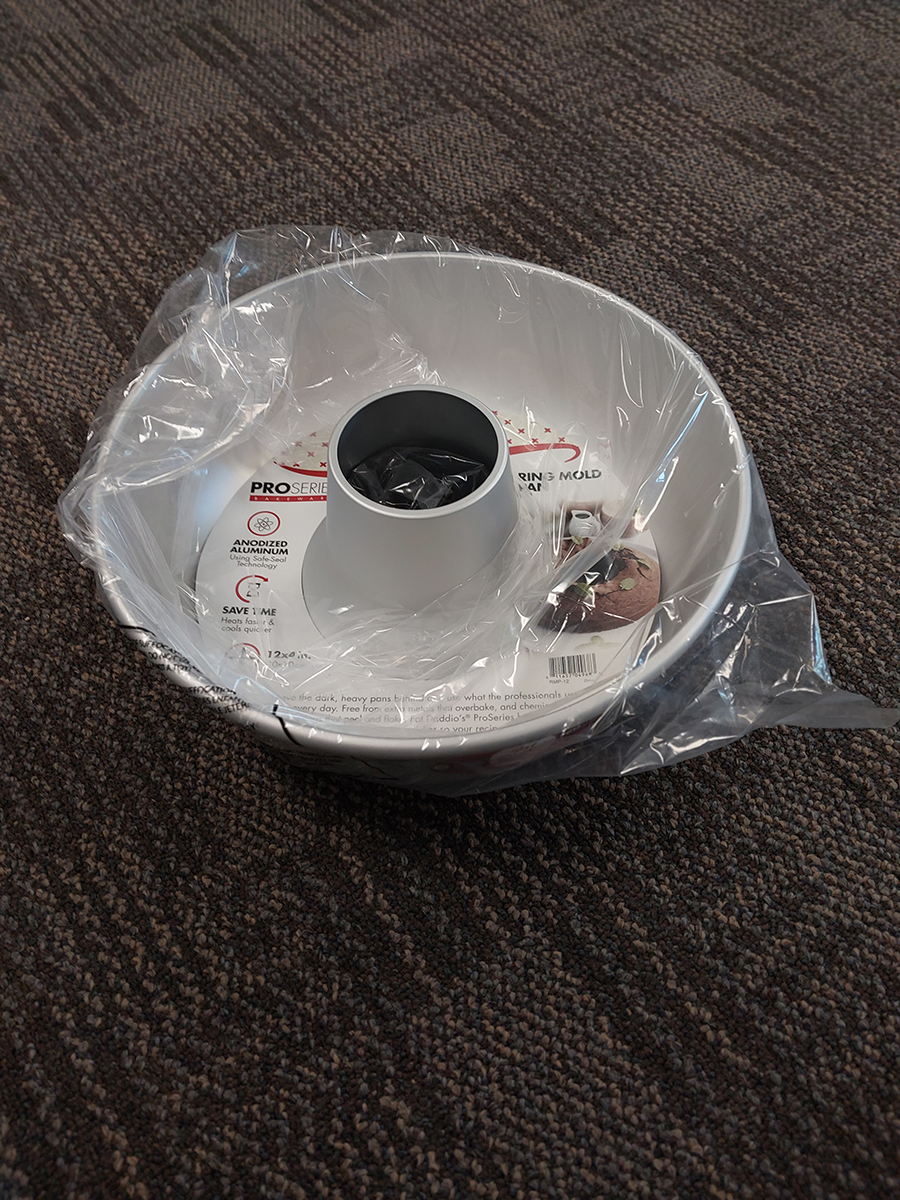
3) Ring Mold Pan
|
You Need to Supply
1) Something to support the Base. A five gallon bucket will do, but a table with a 2” hole over which to center the base is more convenient if you are working up a lot of corn.
2) An air compressor with 80 to 140 psi pressure and at least 2 CFM capacity and a standard quick coupler.
3) Ears of corn, LOTS of ears of corn!
Safety Matters
Although we have taken every opportunity to make The Corn Kernel Cutter the safest product on the market, users MUST understand how it works and what not to do to avoid personal injury.
The Annular Knife is recessed in a protected area that would be very difficult to reach with fingers, but the reciprocating Plunger and Funnel can pinch your fingers or hand if they are placed in the chamber.
Never place any part of your body in the chamber where the corn goes.
Factory set flow control valves limit the speed of reciprocation for safety reasons – do not adjust the flow control valves so as to speed up the action so fast that an operator doesn't have time to react to an unsafe situation.
Always ensure that the Safety Pin is in place before either plugging in or unplugging the air supply.
WARNING! The flow control valves do not slow the reciprocating action when the Control Box is being attached to an air supply, so if the Plunger and Funnel is extended, it will retract at a high rate of speed, pinching anything that is in the chamber. The Safety Pin prevents that.
How it works:
A recessed Annular (cylindrical) Knife is sized with a hole slightly larger than the cob in an ear of corn. The Annular Knife is held over a Base with a hole down its center for the stripped cob to fall through. A Cylinder mates the Knife and the Base together and also supports a 12 inch stroke air cylinder above a Chamber where ears of corn are placed vertically for processing.
With the push of a recessed button on a Control Box, a Funnel and internal spring loaded Plunger pushes the ear down, through the Knife. The Funnel centers the ear of corn in the Chamber so it aligns with the bore of the Knife.
The Funnel bottoms out against the Knife in a way that protects the cutting edge, and then the spring loaded Plunger continues to advance into the bore of the Knife, pushing the cob through and into a trash container.
The Funnel only advances as long as the button on the Control Box is held depressed. As soon as the operator releases the button, the cylinder will retract at a rate metered by the flow control valves, no matter where it is in its stroke.
Instructions for Use:
We have taken every effort to make The Corn Kernel Cutter simple to use, but following these instructions carefully will make your experience trouble free.
-
Prepare your ears of corn for processing in The Corn Kernel Cutter.
Cut the large end of the ear fairly squared off, with the cob flush or no more than about 1/8” of the cob protruding. If the ends are squared off and not too angled, the Funnel will more easily center the ear in the Chamber.-
Ears that are too crooked will not go through the Annular Knife well – some of the cob may get cut off and end up with the kernels. So, sort out ears that are too bowed or crooked.
-
Generally, all the cobs from any given variety of corn are about the same size, so the same Annular Knife size should work whether ears from that variety have large or small kernels. If you are processing more than one variety of corn at a time, and if they have different size cobs, you may want to keep them in separate batches and size the Annular Knife accordingly.
-
-
Set up The Corn Kernel Cutter.
-
On a flat, level surface, place the bucket or table on which you intend to support the Corn Kernel Cutter Base with and set the Base in place.
-
Place the Ring Mold Pan on the Base with the hole centered.
-
Slip the Cylinder over the Base. No tools are needed.
-
If they are not already attached, attach the red and blue air lines between the Control Box and the Air Cylinder. The mating ports are color coded, appropriately. Do this BEFORE attaching the main air supply from your compressor.
-
-
Make sure the Safety Pin is in place and then, only then, attach the air supply from your compressor. Support the valve if a lot of force is required. Keep your hands out of the Chamber at all times.
-
WARNING! If the Safety Pin is not in place, and the air cylinder rod is extended, it may retract rapidly when the air supply is first attached.
-
-
Start Cutting Corn!
-
Place the small end of an ear of corn pointed downward in the Chamber of the Corn Kernel Cutter. Try to center it on the Annular Knife. Let go of it – it may lean in the Chamber, but the Funnel will straighten it and keep it in line as it passes through the knife.
-
After making sure your hands are away from the Chamber, firmly press and hold the recessed Button on the Control Box until the ear has passed completely through the Annular Knife. Release the button once the ear is stripped of kernels, or at any point in the cycle, if you want to retract the Funnel and Plunger.
-
Repeat steps A and B, above, until the pan is full, then lift the whole Cylinder assembly off the base, dump the pan and replace it. Extra pans can be ordered from www.corn-kernel-cutter.com or from various sources on Amazon. Look for Fat Daddios RMP12 pans.
-
-
Cleaning The Corn Kernel Cutter
-
Cleanup takes only a few minutes.
-
Replace the Safety Pin before cleaning.
-
Disconnect the air supply from the Control Box. Leave the air lines attached between the Control Box and the air cylinder.
-
Lift the Cylinder assembly off the Base and rinse. Slightly depress the Funnel against the spring to remove kernels trapped under the Plunger.
-
You can do some deep cleaning by removing the four screws at the top of the Cylinder and easily lift out the top section, thereby gaining access to disassemble the Funnel and Plunger.
-
-
Corn Processing Table Plans
Optimize the use of The Corn Kernel Cutter and your whole process with this table you can build yourself with basic tools. See the attached drawing.
Manufactured in Maries, County Missouri, USA by:
CZ Engineering, Inc,
33863 Highway E
Dixon, MO 65459
(800) 851-0444
cz-sales@cze.com